
Welcome to part four of my Unity 5 basic network game tutorial, in this part we will cover automatically assigning players a team number and colour, and also give them the ability to fire a laser.
If you have been following this tutorial up until now, please note that I omitted a line of code from the OnPlayerIDChanged function of the NetworkPlayer script. I’ve updated that now, with an explanation of the what the extra statement does, so you may want to go back and check it out.
For convenience here is the updated OnPlayerIDChanged function.
Part 4a – Basic team manager
To handle assigning player colours and team names, we’ll create a basic team manager for the game. As with most aspects of this tutorial, I’m going to keep it simple, so the implementation of the team manager doesn’t dwarf the networking concepts I’m trying to demonstrate.
To start with open the Offline scene, create an empty GameObject and rename it TeamManager. Then make a new folder in Assets and call it Teams. Create a new script in the Teams folder, rename it TeamManager and drag the new script onto the TeamManager game object in the hierarchy.
Open up the TeamManager script for editing and replace the default code with the following:-
The awake function handles the task of making sure there can ever only be once instance of the TeamManager.
The function we are really interested in is the SetPlayerTeam function, we will call this every time a new player joins, and pass it a reference to the new player game object.
We then get a reference to the NetworkPlayer component on player game object and set the public teamNumber based on the value of TeamManager.playerCount variable.
Then we increment the value of playerCount, so the next player to connect will be on another team.
Also note the use of the [Server] attribute on the SetPlayerTeam function. What this does is ensure that this code will only run on the server, and will generate a warning if we try to run it on a client. As this function makes changes to player objects it has to run on the server.
So far so good, but at this moment we don’t actually have a teamNumber variable on our NetworkPlayer script, so we need to make that now, and as you’ve probably already guessed this will be a syncvar with a hook function.
So we need to make a few small additions to our networkPlayer script. Open it in your editor by double clicking the NetworkPlayer script in the Assets/Player folder and add the following line beneath the playerID variable:-
[SyncVar(hook = “OnTeamChanged”)] public int teamNumber;
This is where we store our team number for this player, and we will use the hook function to update the appearance of our player depending on what team he is allocated.
Now add the function that we will use to tell the server to change the value of this variable.
Next add this line to the end of the OnStartLocalPlayer function
CmdSetTeam(gameObject);
And add this line to the end of the OnStartClient function
OnTeamChanged(teamNumber);
Finally add the hook function
What this does is firstly store the new teamNumber value in our copy of the variable and then it sets our player material colour to either red or blue, depending on the value of teamNumber.
That’s all there is to it, when a player joins the game, it calls the CmdSetTeam function which in turn calls TeamManager.SetPlayerTeam on the server, which as previously explained allocates a team, so players will be alternately assigned to team zero or one (red or blue) as they join the game.
The OnstartClient function makes sure that other players already in the game are correctly updated in your copy of the scene.
Like I said this isn’t a robust example of a team manager, and won’t guarantee balanced team sizes, but for the purposes of this tutorial it is sufficient to illustrate the basic idea.
This is the full NetworkPlayer script with all the above changes incorporated:-
Once you have incorporated all the above changes, save the script and build and run the game and you will see that the first player to connect changes to red, and the second player is blue, subsequent players connection will alternate between the two colours.
Part 4b – Shooting
Now we’ll give the players the ability to fire a laser (I’ll cover bullet projectiles in a later tutorial).
So the first thing we need to do is prepare our player prefab for this. Begin by dragging the player prefab into the Hierarchy and then with it selected add an empty GameObject as a child (GameObject->Create Empty Child) and rename it Laser.
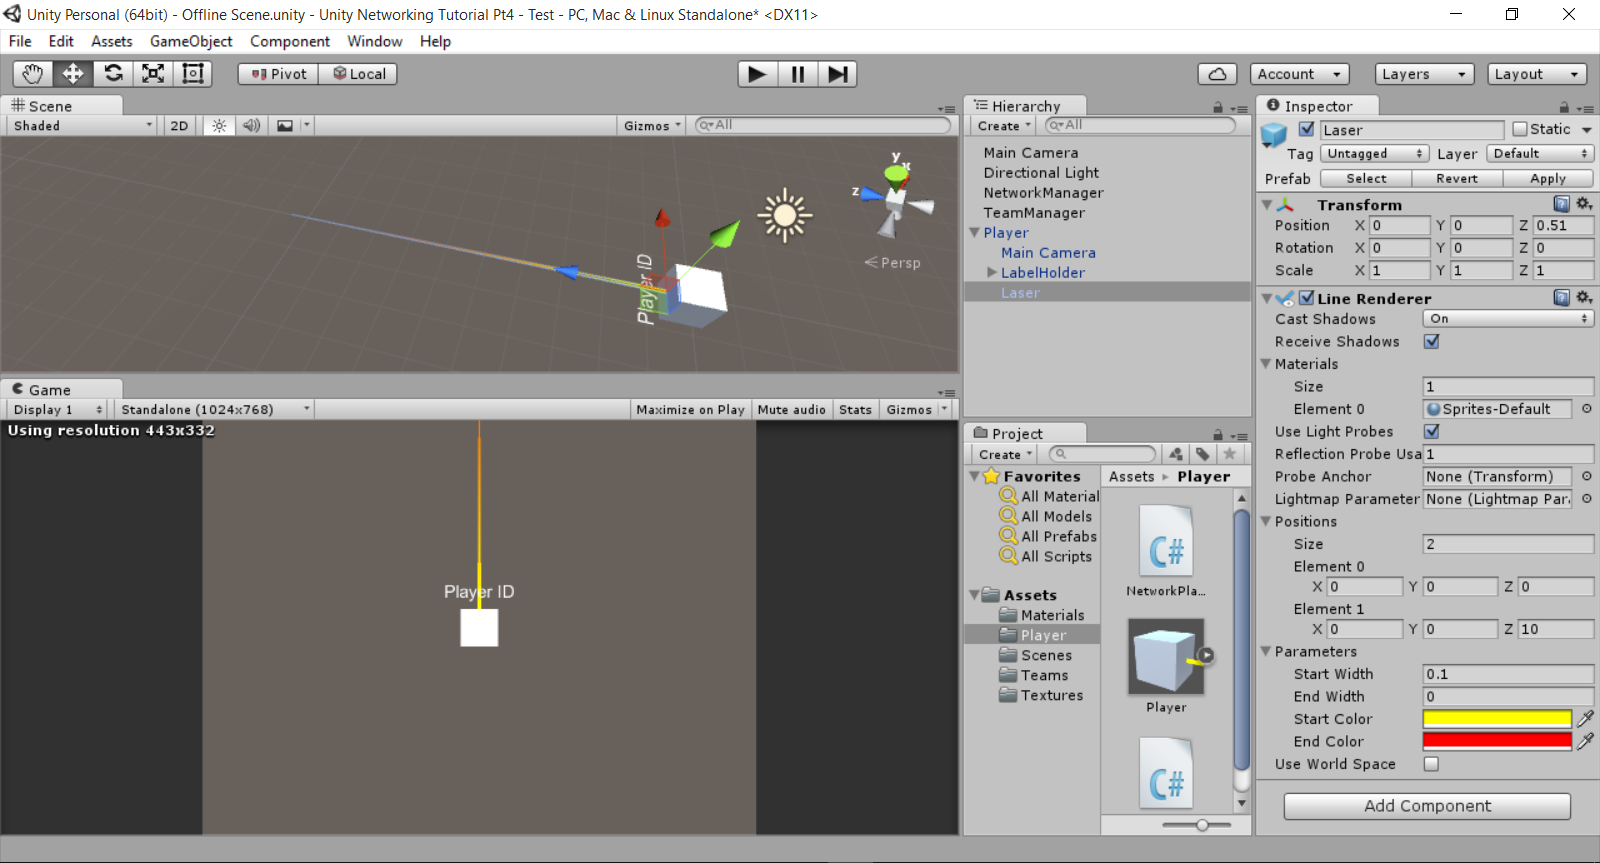
Select the Laser game object and add a LineRenderer component (Component->Effects->LineRenderer) then expand the Materials, Positions and Parameters sections, by clicking the small triangle to the left of their headings.
Next, change the following properties on the LineRenderer
- Transform.Position = 0,0,0.51
- Positions->Element 1 = 0,0,10
- Start Width = 0.1
- End Width = 0
- Start Colour = Yellow
- End Colour = Red
- Use World Space = false (unticked)
Then click the small circle to the right of the Element 0 property in Materials, and in the material selector dialog that opens, double click the Sprites-Default material to select it and dismiss the dialog.
Apply the changes to your player prefab, and it should look like this:-
So now we have a laser, we need a way to use it. In the Assets->Player folder, create a new script and call it PlayerShoot. Open it in your editor and replace the default code with the following and save it:-
Drag the saved PlayerShoot script onto your Player prefab in the hierarchy to add it as a component. Now apply the changes to the player prefab and you can delete it from the Hierarchy.
I’ll explain the important bits of this script.
OnStartClient()
In this we get and store a reference to the line renderer, then disable the line renderer so that it isn’t visible as soon as we start, and finally disable the script, which will have the effect of disabling the script for all clients when they join the game.
OnStartLocalPlayer()
In this function, all we do is re-enable the script for the local player, this means that our player object will be the only player object in the scene that has this script running. Otherwise we would have multiple player objects firing when we pressed the fire button, instead of just our own.
Update()
In the update function, we check to see if the fire button was pressed, and also if we are ready to fire again, and if so we call the Fire function.
Fire()
We do two things in this function, firstly we start the ShowLaser coroutine to display the laser effect on our own PC.
We do that here so that the laser is displayed instantly rather than waiting for a response from the server, which otherwise could give the game a ‘laggy’ feel.
However, we also need to tell all the other clients to display the laser fire on their instance of our player object, so that they too can see we fired our laser.
This is where an RPC (Remote Procedure Call) comes in handy, an RPC is a way to run a function or method on a remote PC. But only the server can issue RPC calls so we can’t call it directly, we need to do it via a Cmd function.
So we use the CmdShowLaser function to call the RpcShowLaser function, and this latter function is then executed on all connected client PCs.
In the RpcShowLaser function, the first thing we need to do is determine if this is running on our local player object or the player object belonging to another client.
Basically, if isLocalPlayer is true, that means we fired our laser, and as we have already displayed the laser effect on our PC during the Fire() function, we don’t need to do it again and can just exit the function.
However if isLocalPlayer is false, then that means that someone else fired their laser, and they are telling us that we need to display the laser effect on our copy of their player object, so we start the ShowLaser coroutine.
ShowLaser()
All this does is enable the Laser LineRenderer for 1/10th of a second and then disables it again.
Lastly the CanFire() function just adds a little delay to how often we can fire.
With this script on the player object and the player prefab saved, if you then build and run the game you will see a brief laser flash in front of the player when you press the left mouse button.
Sadly at the moment this laser is completely ineffective as a weapon, so in the next part of the tutorial we’ll add player health and damage.
See you next time.